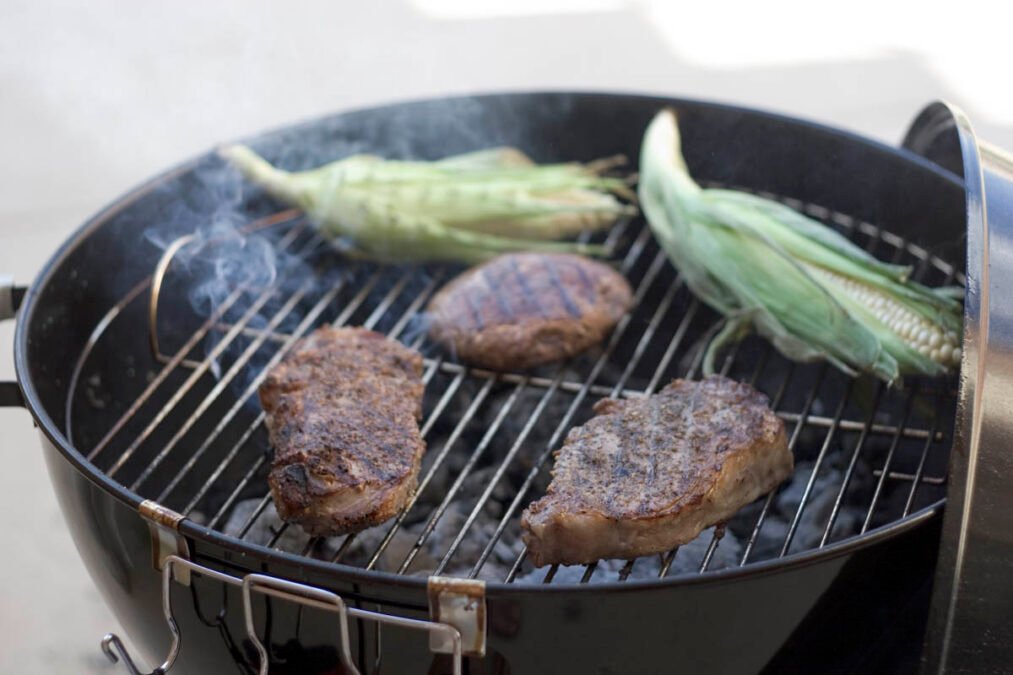
Nothing beats the smell of dinner cooking over an open flame on a warm evening. The sizzle, the smoke, the happy crowd gathered around the patio — a grill turns an ordinary meal into a small celebration. Yet the same grill that makes those memories can turn into a sticky, smoky headache when it has not been cleaned in a while. If you have ever wondered how to clean a grill without spending your whole afternoon on it, you are in the right place. This guide walks you through the quick clean after every cook, the deep clean once or twice a season, and the safe way to handle gas and charcoal models alike. With a little regular care, your grill will heat more evenly, your food will taste fresher, and the whole setup will last for years longer than a neglected one would.
Why You Should Learn How to Clean a Grill Properly
A clean grill is not just about good looks. Old grease and burnt food change the flavour of everything you cook next, and they can turn a relaxed barbecue into a flare-up in seconds. When fat drips onto hot burners or coals, it catches fire, chars your food, and leaves a bitter taste that no sauce can hide. Grease that builds up in the bottom of the grill or in the drip tray is also a genuine fire risk, so keeping it under control is a matter of safety as much as taste.
There is a performance angle too. Burnt-on carbon acts like a blanket over the grates, so heat reaches your food unevenly and you end up with burgers that are scorched on one side and pale on the other. Clogged burner holes make the flame patchy, while ash-clogged vents on a charcoal grill choke the airflow and make it hard to hold a steady temperature. Then there is lifespan: moisture trapped under grease speeds up rust, and rust eats through grates, burner tubes, and the body of the grill itself. A ten-minute tidy after cooking costs almost nothing, while a replacement grill costs a small fortune. In short, a little care now saves money and trouble later.
Safety First Before You Touch a Single Part
Safety sits at the heart of how to clean a grill the right way, so a few ground rules come before any scrubbing. First, always let the grill cool down before you put your hands inside it. A burn-off on high heat is a fine way to loosen residue, but wait roughly 45 minutes to an hour afterwards before taking parts out. Hot metal, hot grease, and bare hands are a painful combination, and patience here is never wasted.
Second, turn the fuel off. On a gas grill, shut the burners and close the valve on the propane tank, or disconnect the tank entirely before a deep clean. On a charcoal grill, close the vents to starve the coals of air and wait until every last ember is cold. Ash can hide live embers for a surprisingly long time, so never scoop it into a plastic bin or a paper bag — use a metal container with a lid, kept away from anything flammable.
Third, work outdoors on a flat, stable surface, keep the grill at least ten feet from your home while it is running, and never leave it unattended or try to move it while it is lit or hot. Wear sturdy gloves for a deep clean, and check your owner’s manual before you start, since different models have different parts and cleaning rules.
What You Will Need Before You Start
You do not need a shelf full of specialist products to learn how to clean a grill. Most of the job can be done with things you probably already have at home, plus one or two sensible tools. Gather everything before you begin, so you are not hunting for a sponge with greasy hands halfway through.
- A stiff grill brush, a bristle-free scraper, or a grill stone
- A bucket or large tub of hot water and ordinary dish soap
- A putty knife or plastic scraper for stubborn carbon
- A spray bottle with a mix of dish soap and water
- Heavy-duty paper towels or clean rags, plus a microfibre cloth
- Tongs, a ball of aluminium foil, and a toothpick or paper clip for burner holes
- A shop vacuum or small hand broom, if you have one
- Rubber gloves, baking soda, white vinegar, and a high-smoke-point oil such as vegetable or canola oil
- A metal container with a lid, for cold ash or old grease
For a quick clean after cooking, you will only need the brush, the tongs, and the oil. For a full deep clean, bring out the whole kit.
How to Clean a Grill After Every Cook
The single best habit you can build is a short clean right after each session, while the grill is still warm. Fresh residue comes off in minutes, while old, baked-on grease can take an hour of hard scrubbing — so this small step makes every other part of grill care easier.
Start with the burn-off. On a gas grill, close the lid, turn all the burners to high, and let it run for about ten to fifteen minutes. On a charcoal grill, leave the lid closed while the remaining coals are still hot. The fierce heat turns leftover food and grease into white ash, which is far easier to brush away than sticky char. Once the smoke dies down, turn the gas off and let the grates cool just enough to handle safely — warm, not scorching.
Next, scrub the warm grates firmly with your brush or scraper, using short, steady strokes, and do not forget the underside, where drips collect. Wipe the loosened ash away with a folded paper towel held in tongs. Finish by rubbing a very light coat of oil over the warm grates with a paper towel gripped in the tongs. That thin film stops food from sticking next time and helps keep rust at bay.
A Quick Routine to Remember
Do this after every cook and the deep clean becomes a light job rather than a dreaded chore.
How to Clean a Grill That Runs on Gas
The first thing to understand about how to clean a grill that runs on gas is that the burners and the grease system need just as much attention as the grates. Gas grills have more moving parts than charcoal models, and each one plays a role in even heat and safe cooking. None of the steps are tricky once you know the order.
Begin with a burn-off on high for ten to fifteen minutes, then turn everything off, close the tank valve, and let the grill cool for 45 minutes to an hour. Once it is cool, lift out the cooking grates and set them aside. Take out the heat tents, flavouriser bars, or ceramic briquettes that sit over the burners, and brush them clean. Then brush the burner tubes gently from side to side only. Never brush along the length of a burner tube, because that can push debris into the gas ports and block the flame. If a port looks blocked, clear it carefully with a toothpick, a bamboo skewer, or the end of a paper clip.
Scrape the inside of the cookbox with a putty knife, pushing the debris down into the grease tray, then vacuum or sweep out whatever is left. Wash the grease tray and drip pan in hot, soapy water, and dry them fully before they go back in. Wipe the inside of the lid, where black flakes of carbon and grease often peel away, and give the outside a wipe with mild soap and a soft cloth. When everything is dry, put the grill back together, reconnect the gas, and do a quick soapy-water leak check around the connections before you light it again.
How to Clean a Grill That Runs on Charcoal
Charcoal grills are simpler machines, but they have their own quirks, and ash is the main one. After cooking, close the lid and the vents, and let the remaining coals burn down. The trapped heat loosens residue on the grates, which you can then scrub while they are still warm. Once the grill is fully cold — and this can take longer than you think — it is time to deal with the ash.
Scoop the cold ash into a metal container with a tight lid. Never use a plastic bin or a paper bag, and never tip ash onto soil or into a compost heap while there is any chance of a hidden ember.
With the ash out, lift out the cooking grate and the charcoal grate and wash them in hot, soapy water. Scrape the inside of the bowl and the lid with a plastic scraper, then wipe them with soapy water and rinse. Clear the bottom vents so they open and close freely, because clogged vents make temperature control a nightmare. Dry every part thoroughly — in the sun if you can — before you put the grill back together, since moisture left in the bowl is an open invitation to rust.
The Deep Clean, Step by Step
A full deep clean is the part of how to clean a grill that most people put off, yet it only takes about 45 to 90 minutes, and your grill will feel almost new afterwards. Plan to do it at the start of the grilling season and again at the end, with an extra round if you grill several times a week or after a grease fire.
Start by heating the grill on high for ten to fifteen minutes to loosen the worst of the residue, then turn it off, shut off the fuel, and let it cool completely. Take out the grates, warming rack, heat plates, and any other removable parts. Fill a large bucket or tub with hot water and a generous squeeze of dish soap, and let the grates soak for at least 30 minutes.
While the grates soak, scrape the cookbox or bowl with a putty knife or plastic scraper, working the debris toward the grease tray or ash catcher. Vacuum or sweep out the loose bits, then spray the interior with soapy water and wipe it down. Clean the grease tray and drip pan in hot, soapy water, and wipe the igniters so they spark cleanly. Then lift the grates out of the soak, scrub both sides firmly, rinse well, and dry them completely. Give the outside a wipe with mild soap and water, put everything back together, and run the grill on high for ten to fifteen minutes to burn off any leftover cleaning residue. Let it cool, put the cover on, and you are done.
How to Clean a Grill Grate by Material
Not all grates are made the same, and the cleaning method that works beautifully on one type can ruin another. Before you reach for a steel brush or a soak, work out what your grates are made of — the owner’s manual will tell you.
Stainless steel grates are the toughest of the bunch. They can handle a stiff brush, a scraper, soap and water, and a baking soda paste for stubborn spots. Dry them well after washing, and do not leave them wet for days, especially in a salty or coastal area, where rust can still creep in. Porcelain-enamelled grates, whether steel or cast iron underneath, need a gentler touch. Use a soft brush and a plastic or wooden scraper, and skip metal scrapers and steel wool, which can chip the coating. Once that coating chips, the metal underneath rusts fast, and the grate is on borrowed time.
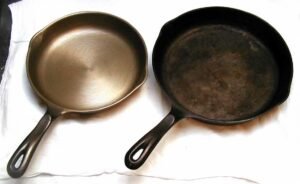
Bare cast iron grates hold heat wonderfully and give food lovely sear marks, but they rust quickly when left wet or bare. Scrub them with hot, soapy water and a stiff brush, rinse, and dry them at once with a towel, followed by ten minutes on a warm grill or in a low oven to chase out every trace of moisture. Never leave cast iron soaking for hours, and never let it air-dry. A thin coat of oil after every deep clean is not optional for cast iron; it is the whole secret to keeping it in good shape. For cast iron pans too, see how to clean a cast iron skillet.
Spotting Trouble Early
While the grates are out, give them a close look: deep rust pits or flaking coating are signs a replacement is on the horizon.
Cleaning Methods Compared
There is no single best way to scrub a grill, because each method shines in a different situation. The burn-off is unbeatable for daily upkeep, soaking wins for deep cleans, and natural pastes are handy when you want to avoid harsh chemicals. The table below puts the most popular methods side by side so you can pick the right one for the job at hand.
| Method | Best for | How it works | Watch out for |
|---|---|---|---|
| Burn-off on high heat | Daily upkeep | Ten to fifteen minutes on high turns residue to ash | Let the grill cool before handling parts |
| Bristle-free brush or scraper | Warm grates after cooking | Stiff scraping removes loose carbon | Replace worn scrapers that no longer bite |
| Soak in hot soapy water | Deep cleaning | Thirty minutes or more softens baked-on grease | Dry parts fully afterwards to stop rust |
| Baking soda paste | Stubborn spots | A thick paste loosens grime without harsh chemicals | Rinse well so no grit is left behind |
| Vinegar spray | Light grease and odour | Vinegar cuts grease and freshens the interior | Never spray it into burner ports |
| Onion on a fork | A quick natural scrub | A cut onion rubbed on hot grates lifts residue | It is a light clean, not a deep clean |
| Steam cleaner | Grates and interior | Hot steam loosens grease with no chemicals | Keep hands clear of the steam jet |
| Commercial grill cleaner | Heavy baked-on grease | A spray cleaner dissolves thick buildup | Follow the label and rinse thoroughly |
How to Clean a Grill Without a Wire Brush
For years, the wire-bristle brush was the default tool for grill cleaning, and many households still have one hanging by the barbecue. Yet the safety picture has changed, and it is worth taking seriously. Loose metal bristles can break off, stick to the grate or the food, and be swallowed without anyone noticing. Doctors have warned that a swallowed bristle can cut the mouth, throat, or intestines, and in serious cases it can pierce the digestive tract, cause infection, and require surgery to remove. Research has suggested these injuries account for more than 130 emergency room visits a year, and the tiny bristles are hard to spot and hard to remove once embedded.
The concern is not just theoretical. In 2026, the United States Consumer Product Safety Commission announced three large recalls of metal wire-bristle grill brushes. Weber recalled more than 3.2 million brushes in February 2026 after at least 38 reports of bristles detaching, including four people who swallowed bristles and needed medical treatment. Nexgrill recalled more than 10.2 million brushes in March 2026, with at least 68 reports and five people seeking medical treatment. Cuisinart followed in July 2026 with a recall of more than 1.7 million brushes, after at least 54 reports and three people needing medical treatment. The safety commission has urged people to stop using metal wire-bristle brushes and switch to safer alternatives.
The good news is that the alternatives work just as well. Bristle-free brushes with a solid coiled steel head, nylon-bristle brushes for cool grates, wooden scrapers that shape themselves to your grate over time, and pumice grill stones all clean effectively with nothing to shed into your food. A ball of aluminium foil held firmly in tongs also makes a surprisingly good scrubber for hot grates, and a steam cleaner can lift grease without any brush at all.
Seasoning Cast Iron Grates the Right Way
Seasoning sounds like something from a cookbook, but for cast iron grates it simply means coating clean, dry metal with a thin layer of oil and heating it so the oil bonds to the surface. That thin layer stops food from sticking, keeps rust away, and builds up into a smooth, dark finish over time. It is one of the easiest wins in grill care, and it takes only a few minutes.
Start with grates that are clean and completely dry — any moisture left on the metal will fight the oil and invite rust. Brush or wipe a very thin layer of high-smoke-point oil, such as vegetable or canola oil, over every surface, including the undersides and the ends. Too much oil is worse than too little, because a thick coat turns sticky instead of smooth. Put the grates back on the grill and run it on high for fifteen to twenty minutes, until the oil stops smoking, then let the grates cool with the lid open. On new grates, or ones you have stripped back to bare metal, repeat the oil-and-heat cycle two or three times to build a proper base layer.
How Often Should You Deep Clean
A clear schedule takes the guesswork out of how to clean a grill regularly, and it is easier to stick to than a vague promise to clean it “soon”. The right rhythm depends on how often you grill, but the pattern below is a solid starting point for most households.
| When | What to do | Why it matters |
|---|---|---|
| After every cook | Burn off residue and scrub the grates | Removes carbon while it is still soft |
| Every three to five cooks | Empty the grease tray and wipe the shelves | Prevents flare-ups and grease fires |
| Monthly in grilling season | Clean heat plates, burners, cookbox, and exterior | Keeps the flame even and the heat steady |
| Start and end of season | Full deep clean and parts inspection | Catches rust before it spreads |
| After a grease fire | Full clean of the grease system and inspection | Makes sure nothing is damaged before reuse |
Mistakes That Shorten the Life of a Grill
Even keen grillers make a few classic errors when learning how to clean a grill, and most of them are easy to avoid once you know what they are. The most common mistake people make when learning how to clean a grill is reaching for the harshest tool or chemical first, when a gentler method would do the job just as well. Steel wool on a porcelain coating, oven cleaner on the exterior, or a pressure washer on a gas grill can all cause damage that no amount of scrubbing will undo. Scorched pans need the same gentle approach — see how to clean a burnt pan.
Another common slip is putting parts away wet. A grate that goes back into a damp grill will rust, and rust spreads from one part to another if it is left alone. Always dry every piece fully, and give the grill a short blast of heat after a deep clean to chase off hidden moisture. Skipping the grease tray is another quiet killer. It sits out of sight, so it is easy to forget, but a full tray is a fire waiting to happen.
Now that you know how to clean a grill from grate to grease tray, the hard part is over. The routine is simple: a quick burn-off and scrub after every cook, a deeper clean at the start and end of the season, and a watchful eye on the grease tray in between. Keep your tools safe, your grates lightly oiled, and your grill covered when it rests, and it will repay you with even heat, better flavour, and many more summers of good food.
So make how to clean a grill part of your regular routine, fire it up with confidence, and enjoy every cookout knowing your grill is in the best shape it can be.